
Cement planters are loved for their modern look and durability—but without proper drainage, plants can quickly suffer. The good news? DIY cement planters with drainage are easy to make and ensure your plants thrive both indoors and outdoors.
In this guide, you’ll learn why drainage matters, how to add it correctly, and how to create long-lasting cement planters that look professional and function perfectly.
Why Drainage Is Essential in Cement Planters
Drainage holes help:
- Prevent root rot
- Avoid standing water
- Improve soil aeration
- Keep plants healthier long-term
Because cement is non-porous, drainage is not optional—it’s necessary, especially for outdoor planters.
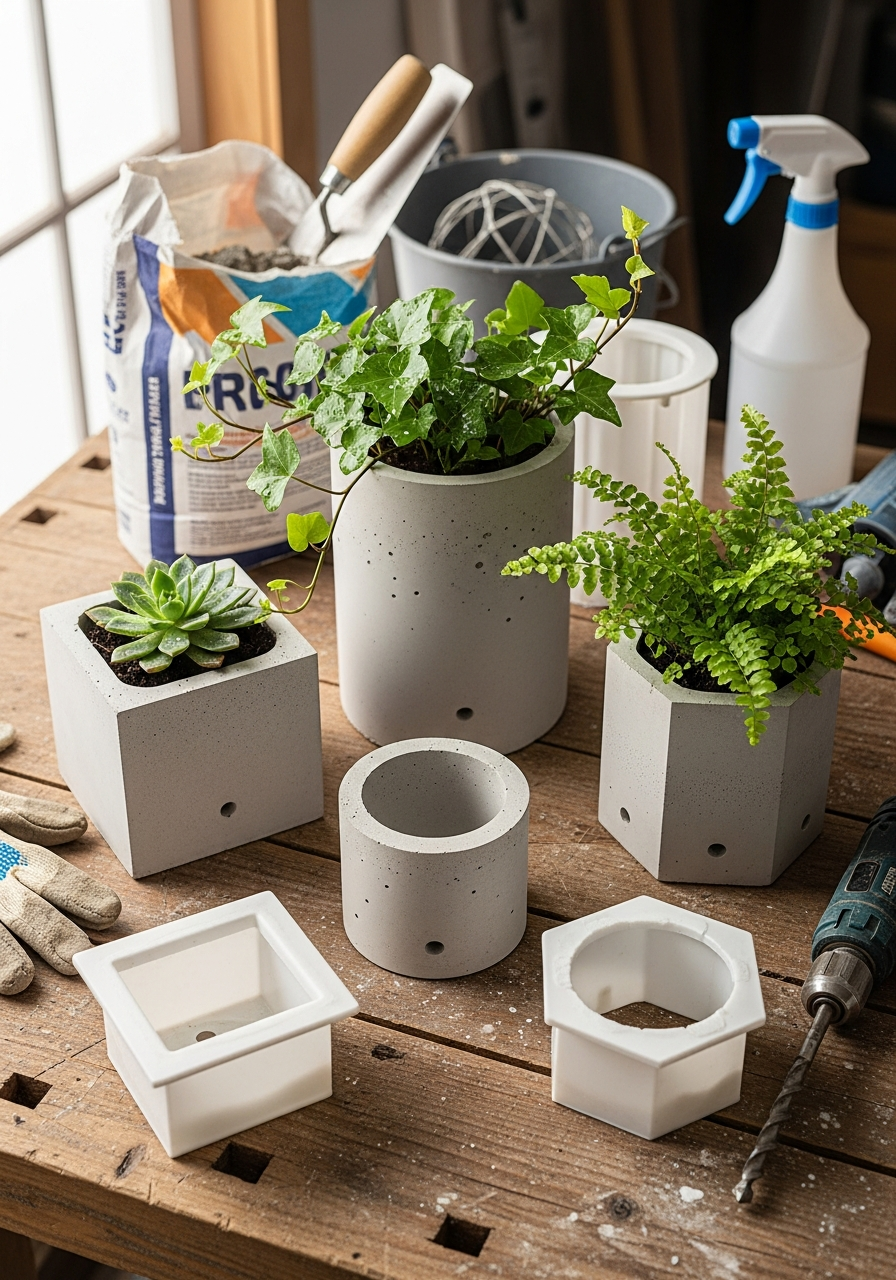
Supplies You’ll Need
- Cement or concrete mix
- Planter molds (silicone, plastic, or DIY containers)
- Smaller inner mold/container
- Mixing bucket
- Water
- Stir stick or trowel
- Cooking spray or mold release
- Straw, dowel, or PVC pipe (for drainage hole)
- Sandpaper
- Optional: sealant, gloves
How to Make DIY Cement Planters with Drainage
Step 1: Prepare the Mold
Spray the inside of the outer mold and the outside of the inner mold with cooking spray or mold release.
Step 2: Mix the Cement
Mix cement and water until you get a thick, smooth consistency—similar to pancake batter.
Step 3: Pour the Base
Pour cement into the mold to form the bottom of the planter (about 1.5–2 inches thick).
Step 4: Add the Drainage Hole
Place a straw, wooden dowel, or short PVC pipe vertically in the base where you want the drainage hole.
✔ Center placement works best.
Step 5: Insert the Inner Mold
Press the smaller container into the center to create the planting cavity. Weigh it down if needed.
Step 6: Fill the Sides
Pour cement around the inner mold, tapping the mold gently to release air bubbles.
Step 7: Cure
Allow the planter to cure for 24–48 hours (longer for large planters).
Step 8: Remove Mold & Drainage Insert
Carefully demold the planter and remove the straw or dowel to reveal a clean drainage hole.
Alternative Drainage Methods
If you forget to add drainage during pouring, you can:
- Drill a hole using a masonry drill bit after curing
- Use multiple small holes for large planters
⚠ Always wear eye protection when drilling cement.
Sealing Cement Planters (Optional but Recommended)
Seal planters to:
- Reduce moisture absorption
- Prevent cracking
- Protect surfaces indoors
Use a water-based concrete sealer and allow it to fully cure before planting.
Styling Ideas for Cement Planters with Drainage
- Leave natural gray for a modern look
- Add concrete pigment for color
- Sand edges for a smooth finish
- Elevate planters with pot feet for airflow
- Group planters in sets of three
Best Plants for Cement Planters with Drainage
- Succulents and cacti
- Herbs (thyme, rosemary, basil)
- Flowers (petunias, geraniums)
- Snake plants and ZZ plants
- Small shrubs (for larger planters)
Drainage makes these planters suitable for almost any plant.
Care & Maintenance Tips
- Check drainage holes regularly
- Avoid letting planters sit in standing water
- Reseal annually for outdoor use
- Protect from extreme freeze–thaw cycles
Final Thoughts
DIY cement planters with drainage combine style and smart design. By taking a few extra steps to add proper drainage, you ensure healthier plants and longer-lasting planters that work beautifully indoors and outdoors.
Strong planters. Healthy roots. Lasting results 🪴🧱✨
Want More Cement & Garden DIY Ideas?
Follow us for budget-friendly planter projects, modern garden décor, and creative outdoor inspiration.