Creating your own garden bed layout doesn’t require expensive tools or expert knowledge. With a little planning and the principles of companion planting, you can design a DIY garden bed that produces healthier plants, fewer pests, and better harvests. This guide will walk you through how to make a DIY companion planting garden bed layout, step by step, using simple methods that work for beginners and experienced gardeners alike.
What Is Companion Planting?
Companion planting is the practice of growing plants together because they naturally benefit one another. These benefits can include pest control, improved growth, better nutrient use, and healthier soil.
Benefits of Companion Planting
- Reduces pests without chemicals
- Encourages stronger plant growth
- Improves soil balance
- Maximizes space in small gardens
- Creates a more resilient garden ecosystem
Companion planting is especially effective in DIY garden beds where space is limited.
Why Build a DIY Garden Bed Layout?
Designing your own layout gives you full control over what you grow and where you grow it.
Advantages of a DIY Companion Planting Layout
- Custom-fit to your space
- Easy to adjust each season
- Budget-friendly
- Ideal for raised beds, in-ground beds, or planter boxes
- Great for learning how plants interact
DIY layouts are flexible, forgiving, and perfect for experimenting.
Step 1: Measure and Prepare Your Garden Bed
Before choosing plants, start with the basics.
- Measure the size of your garden bed (common sizes include 2×4, 4×4, and 4×8)
- Check soil depth and drainage
- Observe sunlight patterns (most vegetables need 6–8 hours of sun)
- Remove weeds and mix compost into the soil
A well-prepared bed makes planning much easier.
Step 2: Choose Your Main Crops
Pick the vegetables you want to grow most—these will shape your layout.
Popular DIY Garden Crops
- Tomatoes
- Peppers
- Cucumbers
- Lettuce and leafy greens
- Carrots
Start with just a few crops to keep things simple.
Step 3: Select Companion Plants
Next, choose plants that support your main crops.
Common Companion Plants
- Herbs: Basil, chives, dill, oregano
- Flowers: Marigolds, nasturtiums, calendula
- Soil helpers: Beans and peas
These companions help repel pests, attract pollinators, and improve plant health.
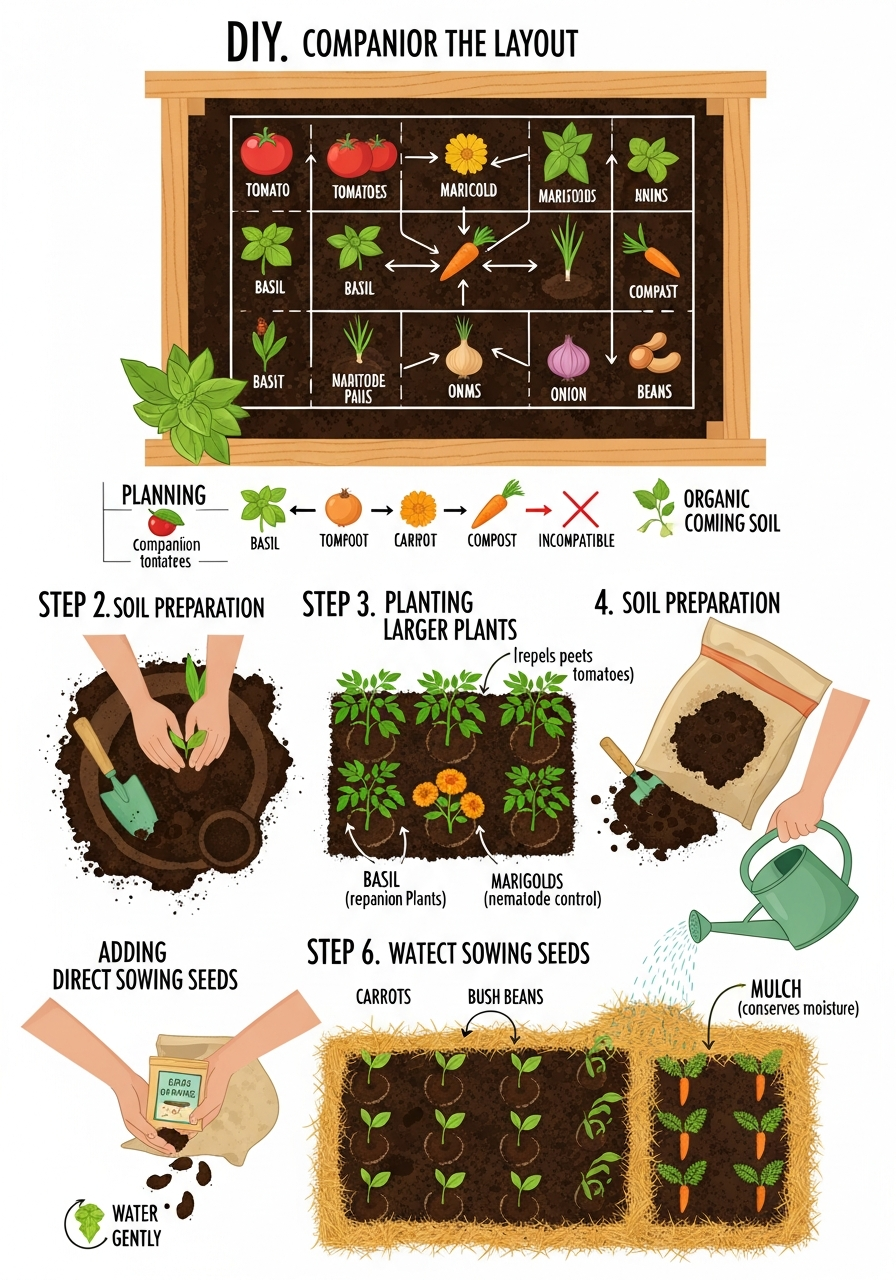
Step 4: Plan the Layout on Paper (or Digitally)
Sketching your layout prevents overcrowding and mistakes.
Simple Layout Rules
- Place taller plants on the north or back side
- Medium-height plants go in the center
- Low-growing plants and herbs go along the edges
- Leave space for mature plant size
You don’t need artistic skills—simple boxes and labels work perfectly.
Step 5: Use Proven Companion Planting Combinations
Beginner-Friendly Pairings
- Tomatoes + basil + marigolds
- Lettuce + radishes
- Carrots + onions
- Peppers + herbs
- Cucumbers + nasturtiums
These combinations are reliable and easy to manage in DIY layouts.
Step 6: Build and Plant Your DIY Garden Bed
Once your layout is planned, it’s time to plant.
- Install your raised bed or prepare the ground
- Fill with quality soil and compost
- Plant according to your layout plan
- Water thoroughly after planting
Stick closely to your layout, but stay flexible if adjustments are needed.
Step 7: Maintain and Adjust Your Layout
A DIY companion planting layout improves over time.
- Monitor plants for pests or crowding
- Harvest regularly to encourage growth
- Prune plants as needed
- Adjust spacing in future seasons
Gardening is a learning process—each season gets easier.
Plants to Avoid Planting Together
Some plants don’t make good neighbors.
Avoid These Pairings
- Tomatoes and potatoes
- Onions and beans
- Cucumbers and sage
- Fennel with most vegetables
Keeping incompatible plants apart protects your harvest.
Common DIY Companion Planting Mistakes
- Overcrowding plants
- Skipping layout planning
- Ignoring mature plant size
- Forgetting crop rotation
Avoiding these mistakes leads to better results.
Final Thoughts: Build a Garden That Works With Nature
Learning how to make a DIY companion planting garden bed layout empowers you to grow healthier plants while working with nature instead of against it. With simple planning, proven plant pairings, and a flexible approach, your DIY garden bed can become more productive and resilient every season.
Start small, experiment, and enjoy the process.
Happy gardening!